When modifying firmware of HACKRF (such as ADS-B BTLE air relay via single HACKRF TDD), debugging method is important. Actually you may add 1602LCD module and UART to hackrf board without changing anything of the board itself. Here are introduction and demo.
####1. Hardware connection
You should have 1602 LCD module and/or USB-UART dongle in your hand. The two things are very popular, you may google their information easily.
1602LCD HACKRF pin connection:
  HACKRF P20 20 -- 1602LCD pin11
  HACKRF P20 18 -- 1602LCD pin12
  HACKRF P20 16 -- 1602LCD pin13
  HACKRF P20 14 -- 1602LCD pin14
  HACKRF P20 11 -- 1602LCD pin6
  HACKRF P20  9 -- 1602LCD pin5
  HACKRF P20  7 -- 1602LCD pin4
  HACKRF    VCC -- 1602LCD pin2 pin15
  HACKRF    GND -- 1602LCD pin1 pin3 pin16
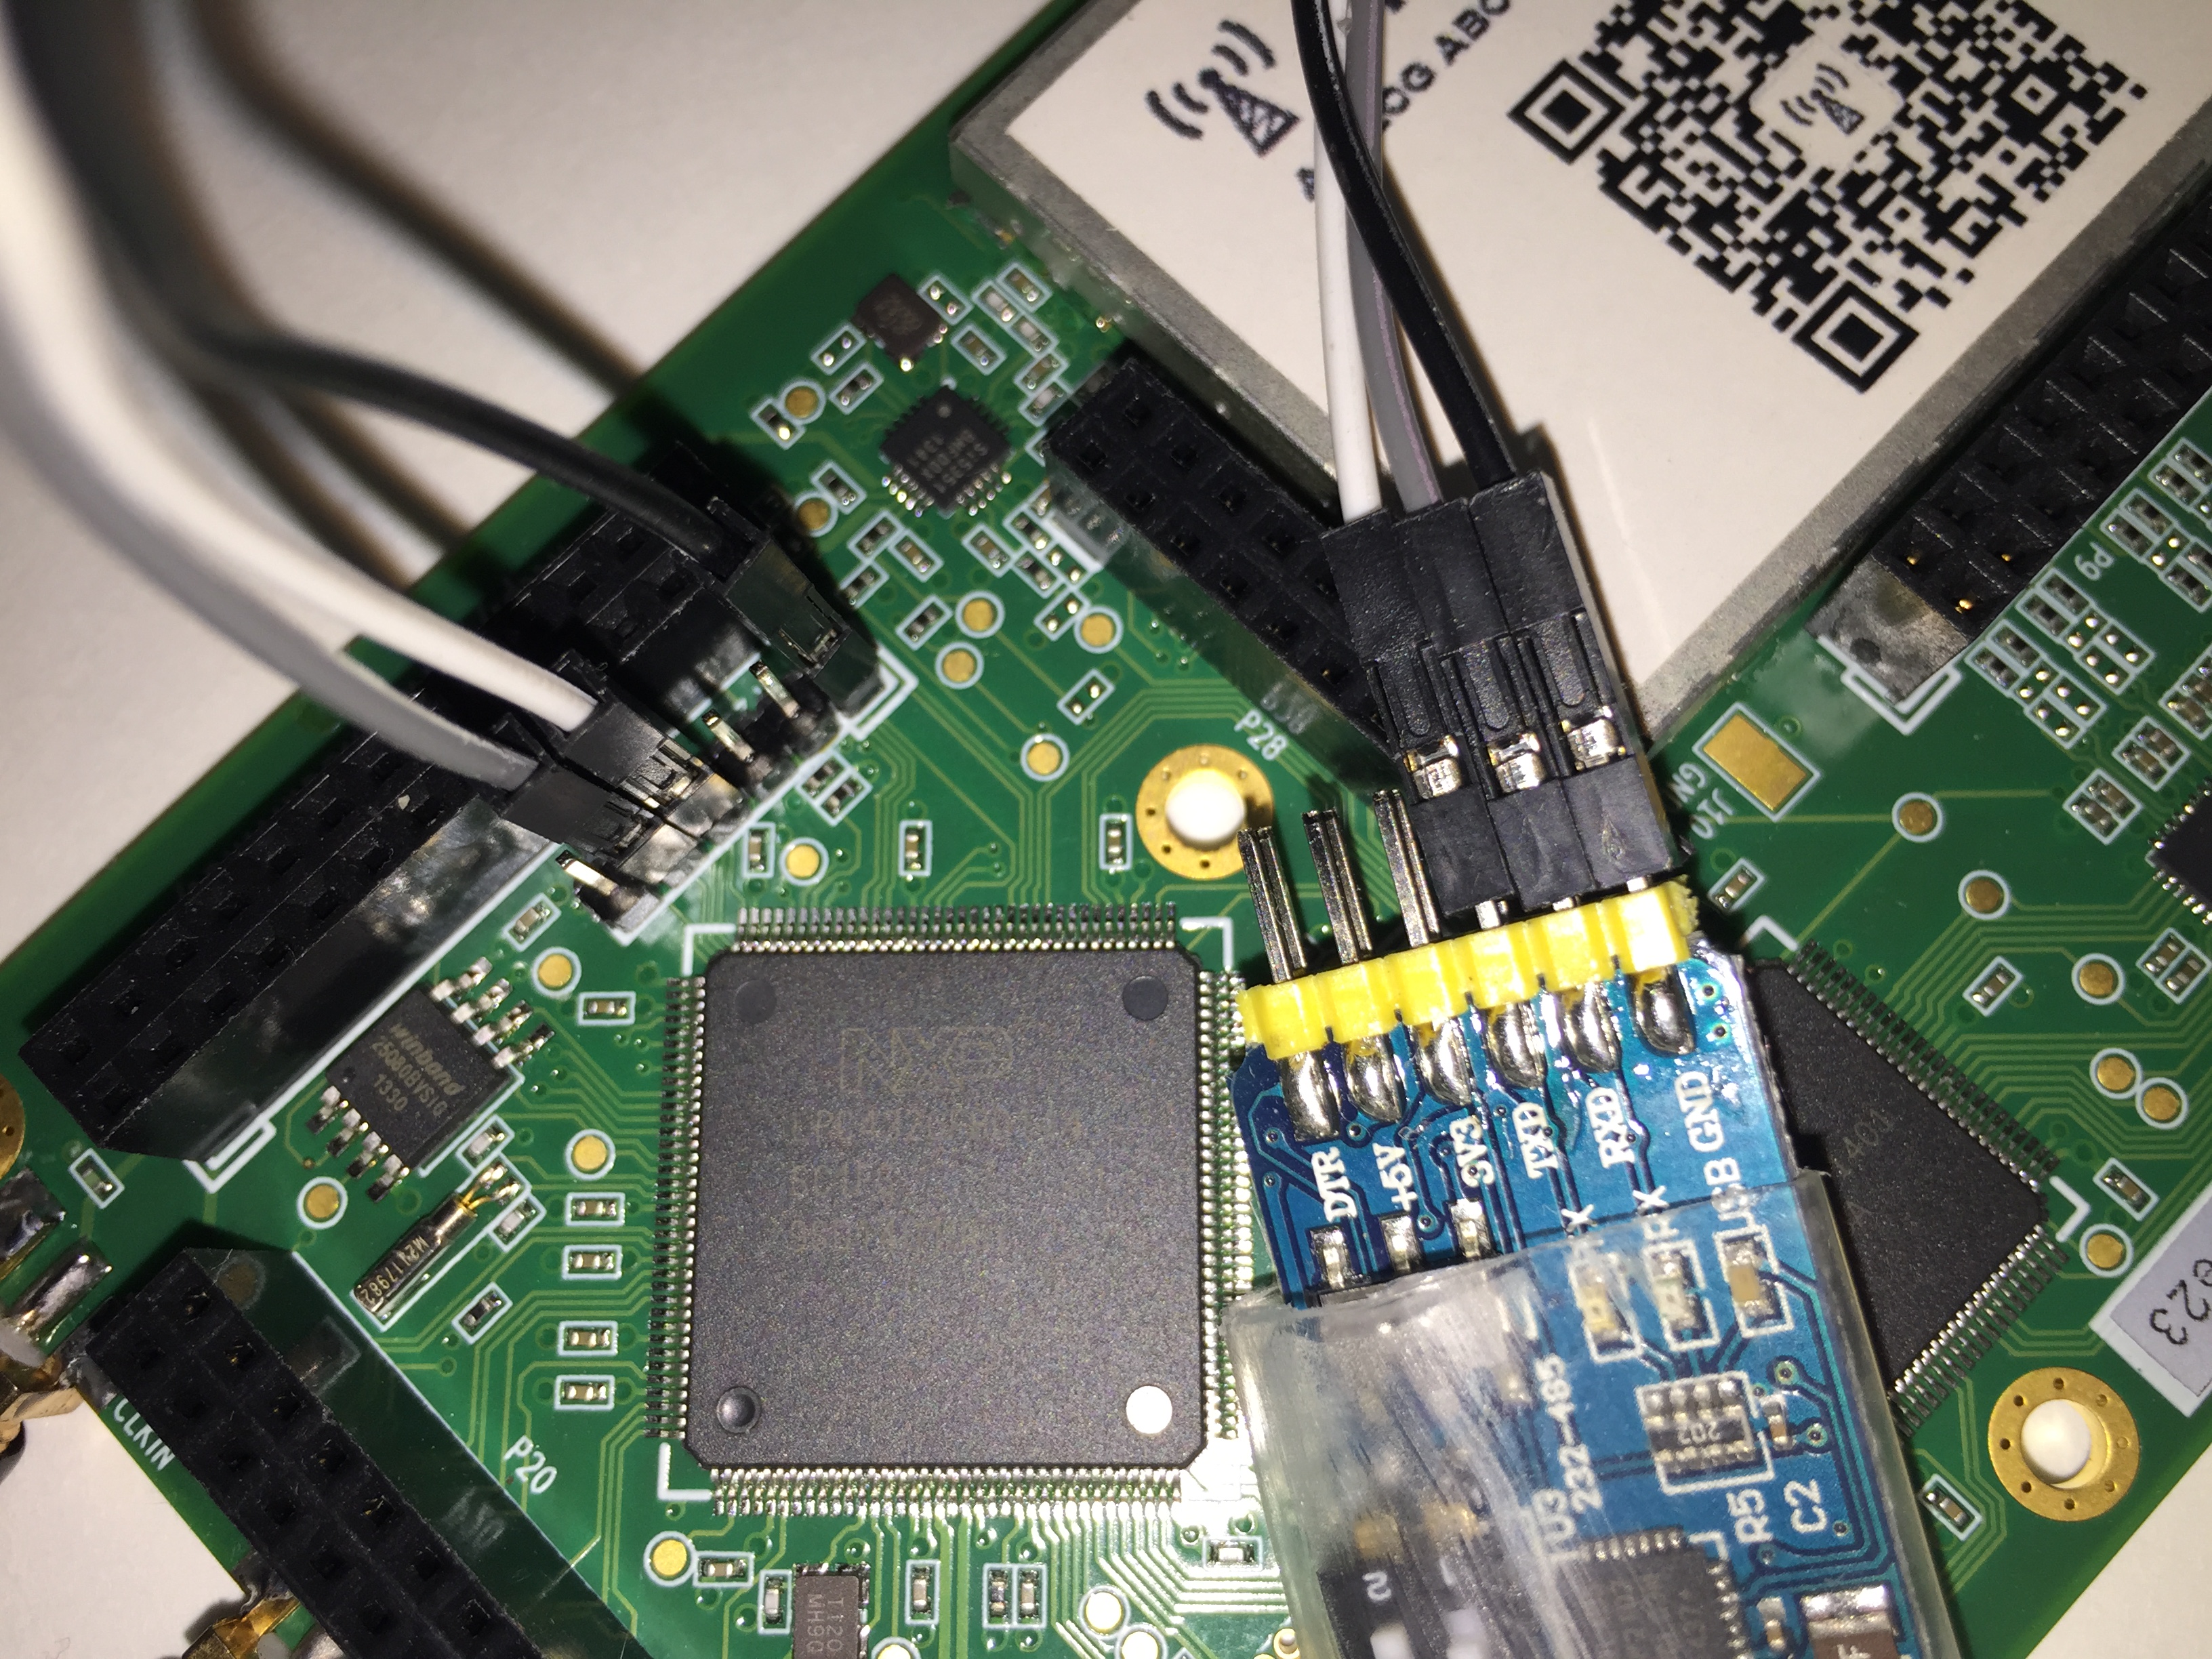
UART HACKRF pin connection:
  HACKRF P25 1 GND        -- GND of computer or USB-uart dongle
  HACKRF P25 4 UART0 RXD  -- TXD of computer or USB-uart dongle
  HACKRF P25 5 UART0 TXD  -- RXD of computer or USB-uart dongle
For HACKRF P20 and P25 location and definition, you can refer to hackrf-one-assembly.pdf and hackrf-one-schematic.pdf in original HACKRF github repo.
Photo of my 1602 LCD module connection:
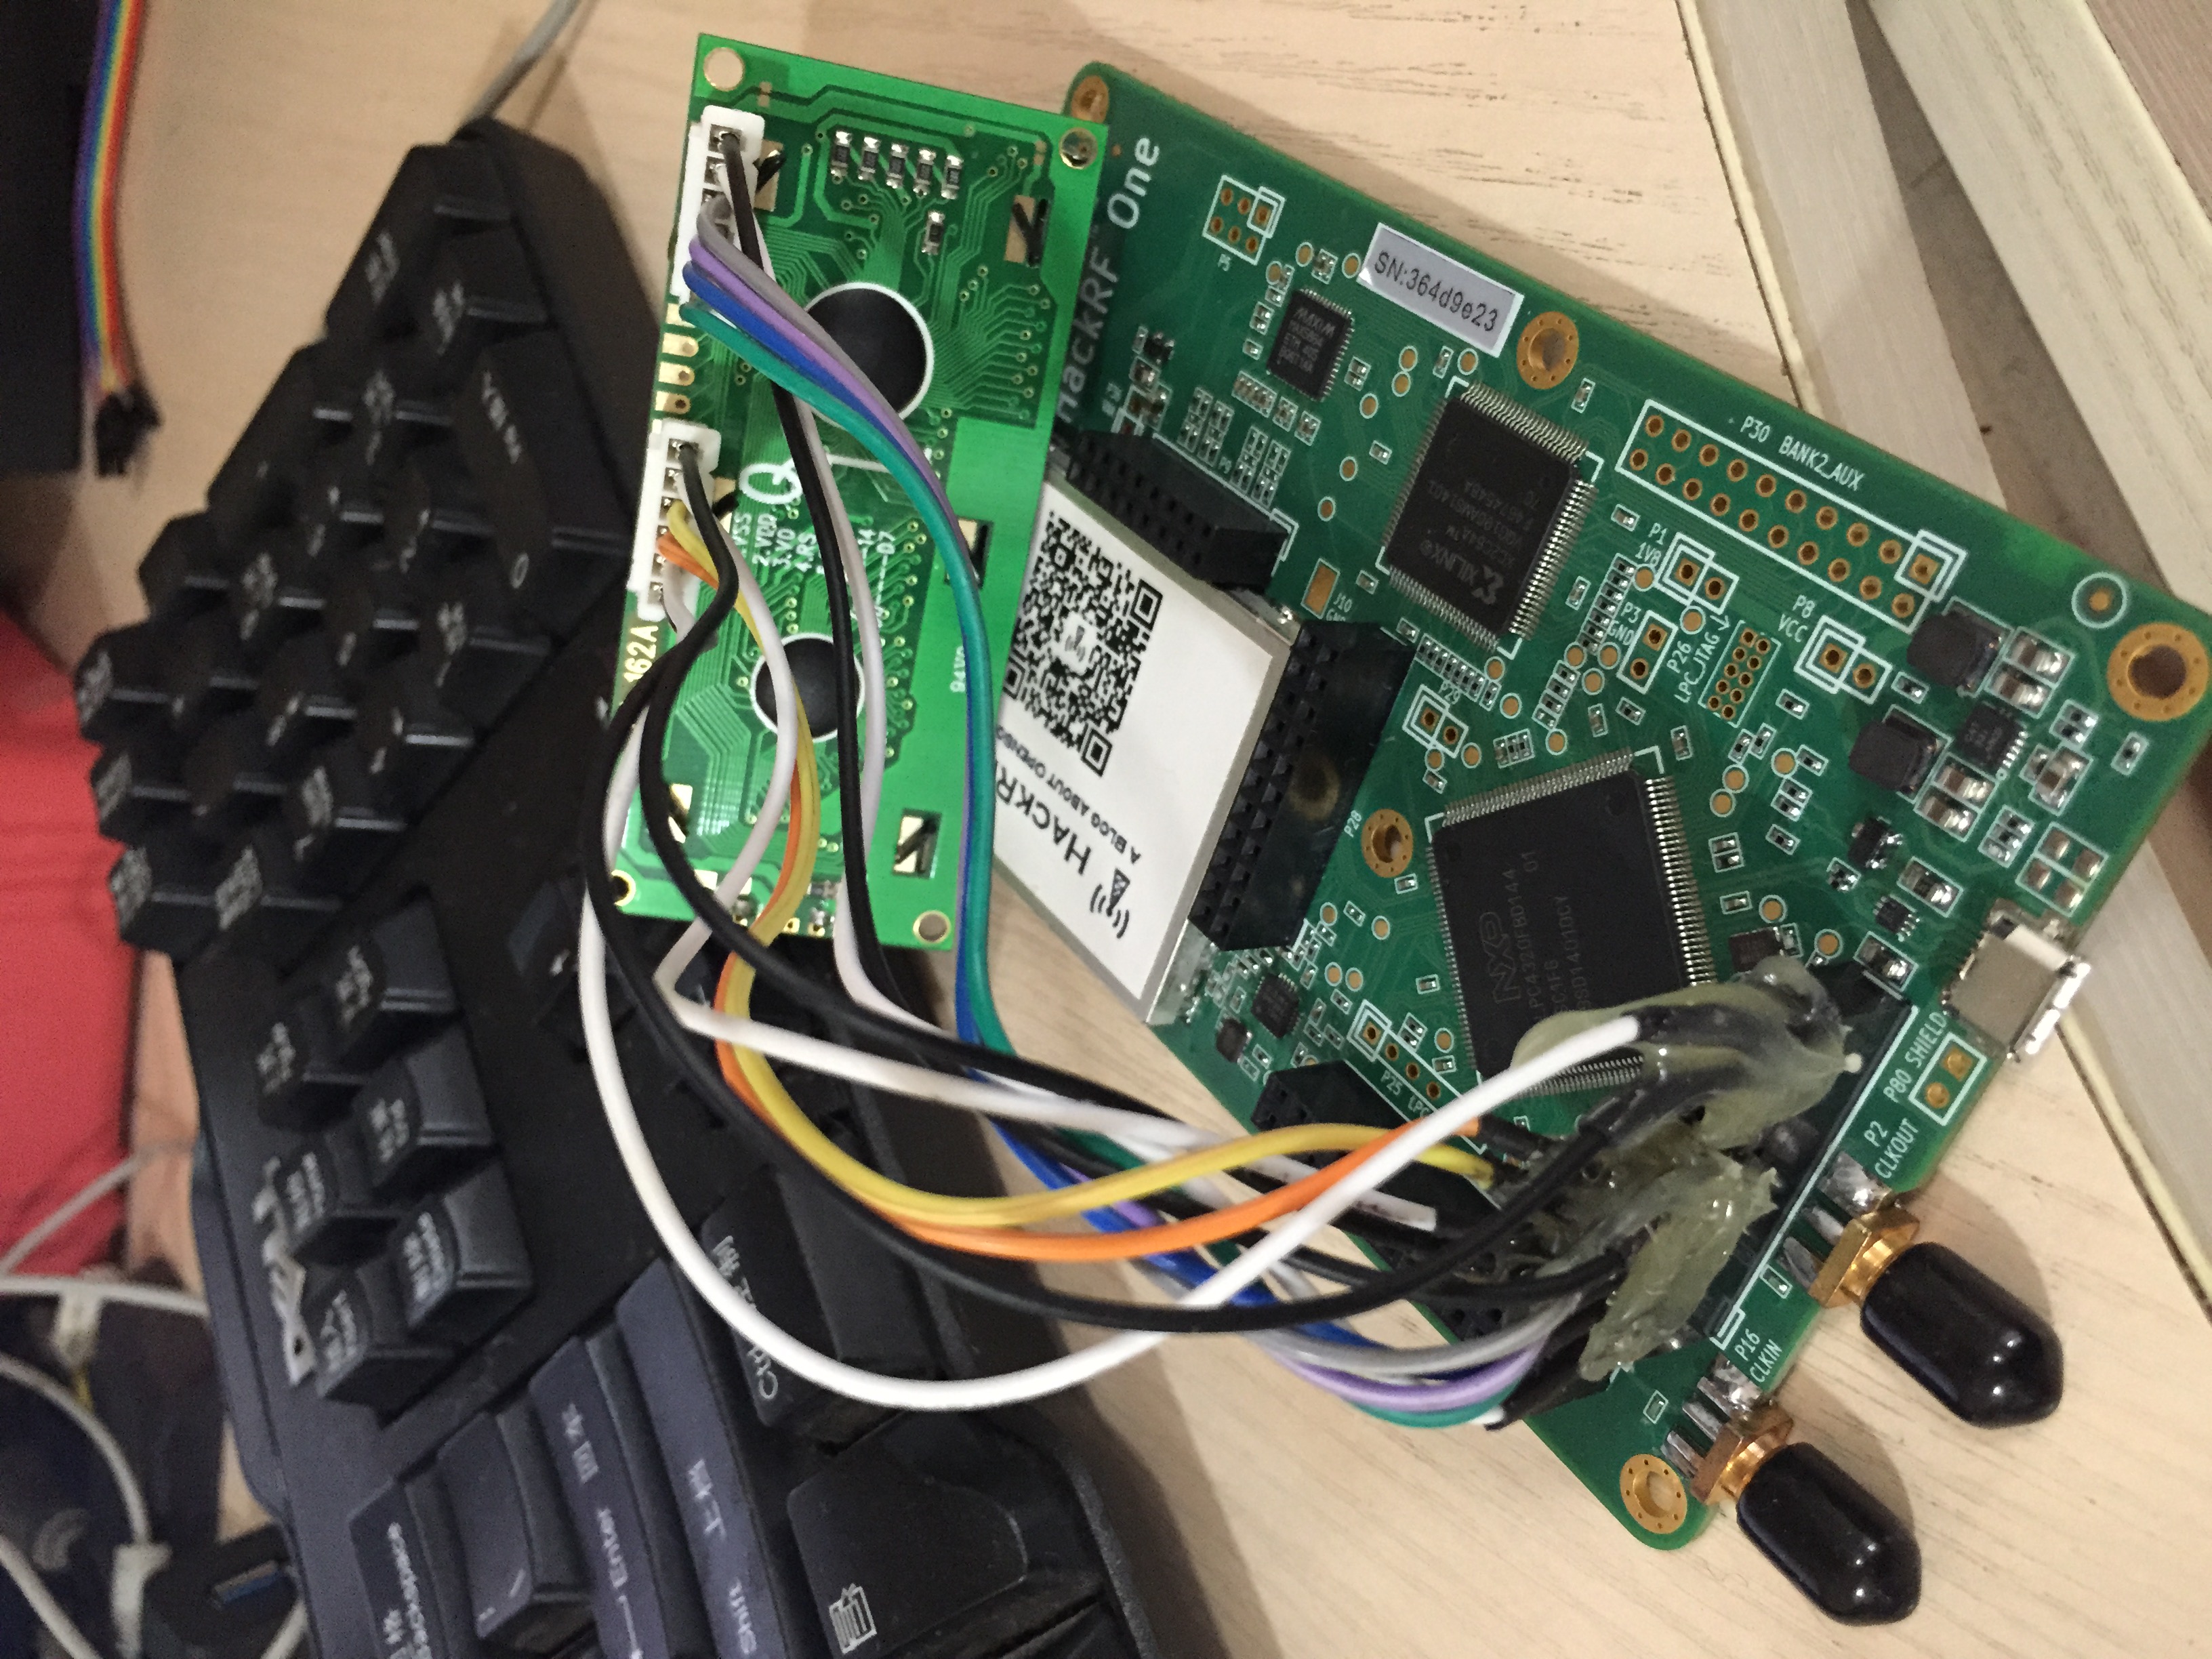
Photo of my USB-UART dongle connection:
####2. Code example and demo
After some struggling in dark, I finally can present you quite simple code to output information via UART or 1602 LCD screen.
Example includes two files: CMakeLists.txt and hackrf_uart_1602lcd.c
Put them in a new created directory hackrf_uart_1602lcd in firmware directory of original hackrf github repo, and build the hackrf_uart_1602lcd project (See part 3 for build method).
I already put a workable code example here: hackrf-UART-1602LCD
A firmware hackrf_uart_1602lcd.dfu is also put into firmware/hackrf_uart_1602lcd/build/ of above repo in case someone want to try it in RAM via DFU mode without building firmware.
  dfu-util --device 1fc9:000c --alt 0 --download hackrf_uart_1602lcd.dfu
  (before dfu-util, make sure set your board into DFU mode)
Here is a demo photo of the firmware running:

In above demo, the code I gave was printing info to LCD module. It also printed info to minicom in Ubuntu via USB-UART link at the same time.
####3. Build firmware of above code by yourself
Basically you can follow instructions in README of firmware directory in original HACKRF github repo to build firmware. For example:
  cd firmware/hackrf_uart_1602lcd
  mkdir build
  cd build
  cmake .. -DRUN_FROM=RAM
  make
But somehow I need to do following things to make sure build go smoothly. If you can’t build firmware, maybe you can give it a shot.
remove “-s 0” in the line of hackrf-common.cmake:
COMMAND dfu-suffix --vid=0x1fc9 --pid=0x000c --did=0x0 -s 0 -a _tmp.dfu
add “COMMAND dfu-prefix -s 0 -a _tmp.dfu” after above line in hackrf-common.cmake. (here is a hackrf-common.cmake which is already modified)
Maybe you need to install this: git://gitorious.org/dfu-util/dfu-util.git (I already put one here dfu-util.tar.gz)
Maybe you need this: sudo apt-get install python-yaml
sudo apt-get install gcc-arm-none-eabi – This compiler NOT WORK!!!
USE THIS compiler!!! –> https://launchpad.net/~terry.guo/+archive/ubuntu/gcc-arm-embedded
!!! If you are using Ubuntu 14.04 and later, please be careful because there are packages with same name but produced by Debian and inherited by Ubuntu. Simply follow the above 3 steps, you may end up with gcc-arm-none-eabi from Ubuntu. So to install gcc-arm-none-eabi from ARM, steps are:
  1). sudo apt-get remove binutils-arm-none-eabi gcc-arm-none-eabi
  2). sudo add-apt-repository ppa:terry.guo/gcc-arm-embedded
  3). sudo apt-get update
  4). sudo apt-get install gcc-arm-none-eabi=4.9.3.2015q1-0trusty13
      or
      sudo apt-get install gcc-arm-none-eabi=4.9.3.2015q1-0utopic14
If you encounter some command not found error, maybe you need:
  cd /usr/lib/arm-none-eabi
  sudo ln -s /usr/arm-none-eabi/bin bin